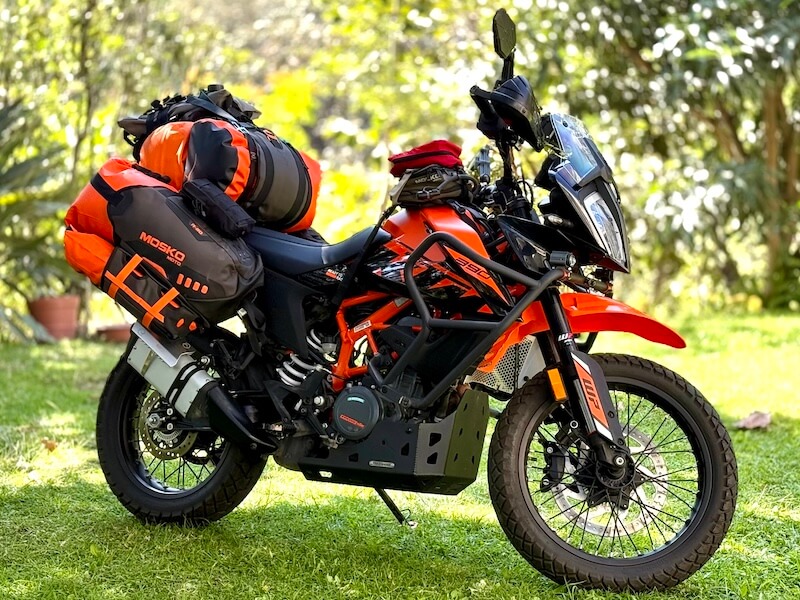
After evaluating about a dozen different motorcycles, I decided that a KTM 390 Adventure was the best match for my ultra-long-distance solo trip from Mexico to Argentina and then up to Alaska. Now that I have bought it, the time has come to transform my stock KTM 390 Adventure into the ultimate machine for my trip.
When it comes to long-distance motorcycle adventures, every detail counts. This journey isn’t just about the miles—it’s about ensuring that every component of my bike is up to the challenge of cross-continental travel. Join me as I walk you through the modifications, upgrades, and personal touches that make my bike adventure-ready.
You can read about the different bikes that I was looking at and the pros and cons of each in my article Choosing the Best Dual-Sport Adventure Motorcycle.

The Starting Point: A Stock KTM 390 Adventure

Before any modifications, there’s a certain charm in a stock bike. My KTM 390 Adventure already had a sleek design and a promise of performance, but I knew that for an expedition spanning from the wilds of Patagonia to the frozen frontiers of Alaska, I needed more. I began by returning to Guadalajara with all the gear and parts I picked up during my trip to Arizona. Laying everything out, I made a detailed list of every item—a gear list I’m happy to share if you comment “Gear List” on my videos!
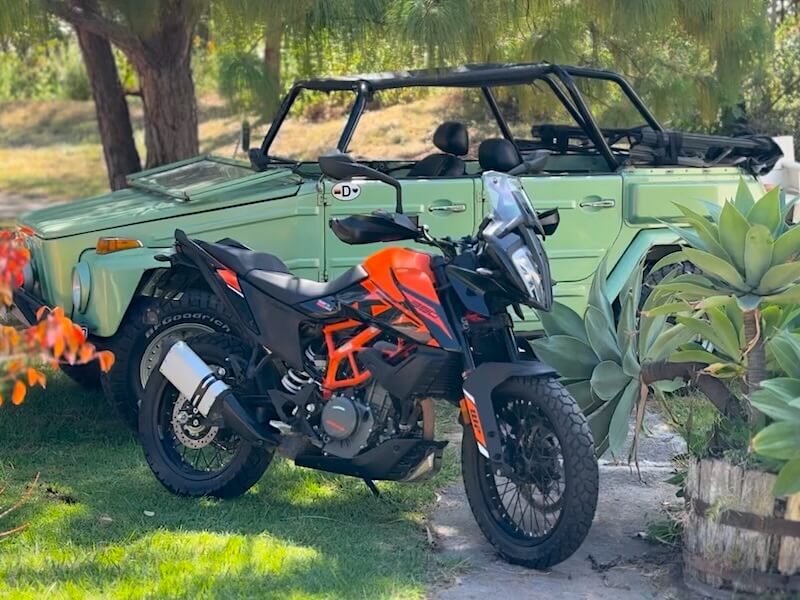
One of the first things I did was take a few “before” shots. I had to admit, the bike looked great, and I couldn’t help but appreciate its clean lines, especially with the ultra-clean VW Thing belonging to my buddy Dan in the background. But it was time to roll up my sleeves and get to work.
Upgrading for Durability and Functionality
Seat Swap for Enhanced Comfort and Off-Road Riding
My first upgrade was relatively simple – I replaced the stock two-piece seat with a one-piece seat. This new seat is supposed to be more comfortable and is better for riding off-road as it will allow me to shift my weight easier. It adds a little bit to the seat height, so if you are a shorter rider you might want to skip this mod.
Installing the Tusk Rear Rack
Next up was the removal of the stock handles to install the Tusk rear luggage rack. It might seem counterintuitive to remove something you love (I really liked the stock handles), but the rear rack is needed so that I can mount my luggage system. It bolts into the same mounting holes as the stock handles, and I made sure to apply blue threadlock to all the nuts and bolts. Once everything was tightened, I could see how well the Mosko Moto luggage system would integrate with the new setup.
Oversized Kick-Stand Plate
I bolted on an oversized kick stand plate using a bit of silicone to eliminate rattling. This might seem like a minor tweak, but gives me a little more surface area to keep the kick-stand from sinking into softer ground.
Wiring and Mounting the GPS
The next part of this project was installing the Garmin Zumo XT2 GPS. Here’s how I did it:
Opening the Headlight Housing
The headlight housing is a labyrinth of different screws. A word of advice— if you are dis-assembling your headlight housing, make sure to label your screws so that you can reassemble everything correctly! This will save you countless hours of guesswork when putting the headlight back together.
Connecting the Wiring
After removing the headlight, I located the un-switched accessory wires that would power the GPS. I measured, cut the GPS wire to the right length, crimped on the terminals, and covered them with heat-shrink tubing. Then, I routed the wire back through the headlight housing and connected it to the accessory wires.
Testing the Setup
The moment of truth came when I powered up the GPS— and it worked perfectly! Although I ran out of daylight during the previous day’s session, I completed the GPS installation the following day.
Assembling the GPS Mount
I put together three different parts for a secure mounting solution. The bottom component was an adjustable aluminum mount by Nice CNC, which bolted just above the dashboard. Then, I added the Garmin mount with integrated wiring. Finally, I fixed a Touratech mount on top that clamps onto the GPS and comes with a locking mechanism (complete with a key) to prevent theft. The end result? A robust, secure, and professional-looking GPS setup that I can rely on through every twist and turn of my journey.
Upgrading for Protection and Off-Road Performance
Handguards, Mirrors, and More
No long-distance trip is complete without proper protection. The stock plastic handguards are likely to break with the first fall so I replaced them with aluminum brackets from T-Rex Racing, paired with BarkBusters wind deflectors. This upgrade provides much superior durability while protecting my hands.
Next, I tackled the mirrors. The stock mirrors are notorious for breaking in falls—something I can’t afford on a cross-continental journey. I installed a Double Take adventure mirror kit, which features two pivot points. This design allows the mirrors to bend out of the way during a fall, reducing the risk of breakage and making adjustments easy after an incident.
Handlebar and Clutch Cable Adjustments
To improve riding comfort, I installed 25 mm spacers to raise the handlebars. This adjustment enhances my riding position, especially when standing on the foot pegs. However, raising the handlebars resulted in a short clutch cable. Fortunately, I discovered that a clutch cable from a Royal Enfield Himalayan was just a bit longer than the stock KTM cable and fit perfectly—an easy fix that made a world of difference.
Skid Plate and Crash Bars
A flimsy skid plate was the last thing I needed. I removed the stock skid plate and replaced it with a sturdy aluminum version from T. Rex Racing. They also offer crash bars that work seamlessly with their skid plates, so I installed the crash bars first, then bolted on the new skid plate, ensuring every nut and bolt was secured with thread-lock.
Upgrading the Radiator Grill and Fender
Another area where the stock parts showed their weakness was the radiator grill, made entirely of plastic. I replaced it with an aluminum grill, also by KTM, for a more robust and long-lasting solution. I then turned my attention to the fender. The stock fender, while stylish, tends to get clogged with mud—something I definitely want to avoid. I removed it and installed a high fender kit by Tusk. The high fender not only prevents mud buildup but also gives the bike a more off-road enduro look. Installation involved using a provided template for drilling, removing the side covers from the stock fender, and carefully bolting everything in place.
Foot Pegs Upgrade
For long rides, comfort is key. The stock foot pegs, which are slightly angled forward, aren’t ideal for off-road riding. I replaced them with larger, level foot pegs from Black Dog Cycle Works. These new pegs sit half an inch lower than the originals, giving me a little extra leg room and improving my riding comfort on long stretches.
Luggage Setup and Final Touches
With the mechanical upgrades nearly complete, it was time to focus on the logistics of carrying everything I’d need on this epic journey.
Mosko Moto Reckless 80L Luggage System
For a trip spanning thousands of miles, you need a reliable luggage system. I installed the Mosko Moto Reckless 80L system, which is designed to securely hold all my gear. The harness for this system is fixed to the bike with two straps at the front (attached to the passenger foot peg brackets) and two straps at the rear, which can be replaced with an optional metal accessory called the “Gnoblin.” The Gnoblin is made of metal and replaces the rear straps with a sturdier mechanism.
After assembling the harness and attaching it to the rack, I packed my gear in the Reckless 80L dry-bags. These consist of 25-liter and 4-liter dry-bags on each side, as well as their 22-liter Stinger dry-bag that goes on top. That’s when I discovered that I still needed more space, so I added an extra 25L bag on top. I also added some smaller bags on each side and bags for my two 1-liter water bottles in the rear. I packed my tripod and selfie sticks in the tent pole bag that comes with the Reckless 80L luggage, plus a separate bag just for the tent poles.
Wrapping up the luggage system installation, I mounted the included heat shield to protect the side bags from the exhaust heat.
Mosko Moto Gnome Tank Bag
I chose to go with the Mosko Moto Gnome tank bag, which seems to be just the right size. Its 5L storage capacity includes a 1.5L water bag with a hose, so I can easily drink some water without having to stop. The Gnome mounts in a landscape orientation on top of the tank, leaving enough space to stand comfortably without restricting movement.
USB Charging Ports
The 390 Adventure doesn’t come with any USB charging ports. Instead, it has a cigarette lighter outlet below the dash, so I bought an adapter that plugs in there and has two USB outlets. From that adapter, I can run wires to my cameras if I need to charge them and can also run a wire into the tank bag and charge devices there.
KTM does offer an OEM USB charging port, but it goes under the seat. It seems like a strange place to put it, but I figure that it may come in handy someday, so I went ahead and installed it.
Ready for the Road
After countless hours of modifications, tests, and adjustments, my KTM 390 Adventure is now fully prepped and ready for my mega journey —from Guadalajara, Mexico to the rugged landscapes of Argentina to the icy frontiers of Alaska. Every upgrade, every tweak, and every personal touch has been implemented to ensure that my bike is not only capable but also comfortable and reliable, no matter what challenges lie ahead.
If you enjoyed this breakdown of my bike prep process, you will most likely enjoy my YouTube video showing all the prepping details. Also, check out another one of my YouTube videos, testing my fully prepped KTM 390 Adventure on some short trips before embarking on my epic journey. I’d love to hear your thoughts on my setup—let me know in the comments what you think about the upgrades and if you have any suggestions!
Thank you for joining me on this part of my adventure. Stay tuned, and keep riding!
Follow Me:
Youtube: https://www.youtube.com/@BajaMoose
Instagram: https://www.instagram.com/bajamoose/
Facebook: https://www.facebook.com/bajamoose
Website: https://bajamoose.com


